 One of the most important new features in Kdenlive is copy & paste between projects. But instead of a forgetful clipboard, Kdenlive gives use its new library to permanently remember all your best timeline stuff...
The Library
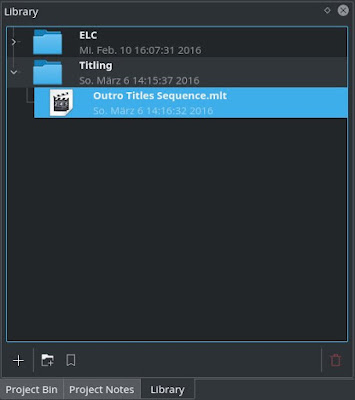
The Library is a completely new Kdenlive pane as well as a new Kdenlive concept. In Kdenlive's user interface, I like to group the library with the project bin, as can be seen below. The reason to me is that the library looks similar to the project bin. And at least at this time you cannot directly drag and drop items between the project bin and the library, so you don't need them both to be visible at the same time. But more about using the library later.
 |
| The new Library pane. |
Kdenlive's library stores sets of clips and transitions in form of what I may (for lack of an offical term) dub library clips or library items. Library clips are persistent and get stored in your file system; more about that in a few seconds. You can organize your library items into folders and subfolders, similar to what can be done with clips in the project bin.
Behind the scenes, these new library clips are in fact MLT playlists. This can also be seen in the screenshot above from the library clip ending in the .mlt file extension.
As I mentioned above, library items are stored permanently in your file system: in a dedicated folder, optionally using subfolders. You can configure where Kdenlive stores your library inside Kdenlive's Configure dialog. Go to the dialog section Environment, then tab Default folders, where you'll find a new fourth folder configuration named Library folder (highlighted in the screenshot below). You can either keep the default setting or specify your own library storage location.
 |
| Configuring the Library folder. |
Copy...
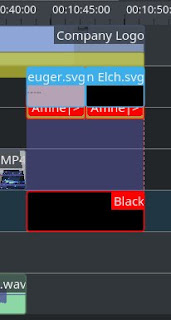
In order to copy some timeline clips and transitions to the Library, you simply select them in the timeline. You don't need to group them, just selecting them is already fine.
 |
| Select some elements in the timeline... |
Next, press the bookmark button at the bottom of the Library pane. Kdenlive then asks for the name of the new library item. Enter a suitable name, and press Ok. Afterwards, you can easily arrange your library items into folders using drag and drop within the Library.
Of course, you can also delete library items again at any time using the trash can button.
...and Paste
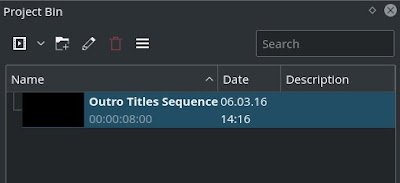
Now let's paste a library item into another project. Unfortunately, there is no drag and drop yet. Instead, select a library item, then click on the add button at the bottom of the Library pane. Don't worry if the library clip doesn't show up in your timeline yet. That's because the add button adds the currently selected library item to your project bin instead of to your timeline.
 |
| Pasted library item. |
You can now drag this new project clip into your timeline; anywhere(*) you want it to be. You may leave it as is: a single MLT playlist clip as shown below. But often you may want to edit and customize the contents of a library clip...
(*) almost anywhere, but best to the end of your timeline at this time. See below for some current restrictions when you later want to expand a library clip.
 |
| Pasted library clip drawn into timeline. |
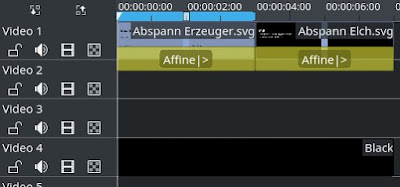
To expand such an MLT playlist clip, make sure to select it in the timeline first. Then go to the Timeline menu and select Current Clip, then Expand Clip. Depending on how complex your library or MLT playlist clip is, Kdenlive may crunch the CPU for a few seconds before the individual clips and transitions finally appear in place. You can then make changes to the expanded elements as you want. Really sweet.
 |
| Expanded library clip: the individual clips and transitions from a library clip. |
Now compare the screenshot immediately above with the earlier screenshot showing the original timeline selection: the clips correctly keep their relative track ordering. However, Kdenlive always starts expanding from track 1 down.
After expanding a library clip you should notice a new folder with some clips inside it in your project bin. These are the individual clips from inside the (now expanded) library clip. You can arrange them as you please. In addition, you may also want to delete the library clip (MLT playlist clip) from your project bin as it is not needed anymore after expansion.
Sometimes, Kdenlive does not expand a library item. Unfortunately, Kdenlive gives no error indications if it cannot expand; at least for now. So what could have went wrong...?
- One reason may be that the library clip uses more tracks than there are tracks in your timeline.
- Another typical reason is that there is no room around the library clip in the timeline for expansion due to other clips above or below it, or next to it. Kdenlive seems to be extremely picky about this. In particular, if track 1 is occupied, expand will typicylly fail. So it's best if you simply drag your library clip to the end of the timeline before expanding it, because there is then no other clip lurking around, blocking expansion. At the end of the timeline you can usually expand your library clip without problems, unless there is some other issue.
To sum up, the new library mechanism in Kdenlive surely is a great new feature. A big thank you to the Kdenlive developpers for implementing it!


